We continue to develop Metasequoia 4 to make it easier for more users.
However, new users or users who have used the software after a long time may miss Metasequoia's features.
In this article, we will introduce some of the features we haven't introduced in detail in the past.
Expression by Mapping and Paint command
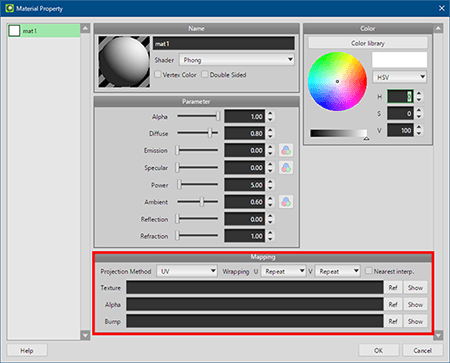
We will introduce three types of [Mapping] supported by [Phong] shader, which is the default material of Metasequoia 4.
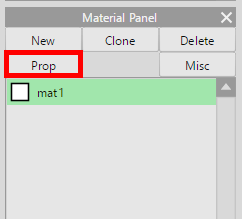
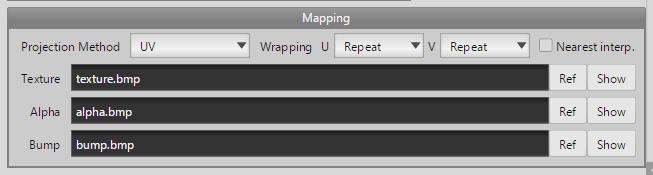
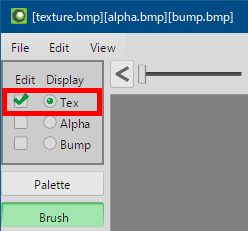
Click [Prop] in [Material panel] to open [Material Property]. the [Mapping] section is at bottom of the property dialog.
You can specify image files in the [Texture], [Alpha], and [Bump] fields.
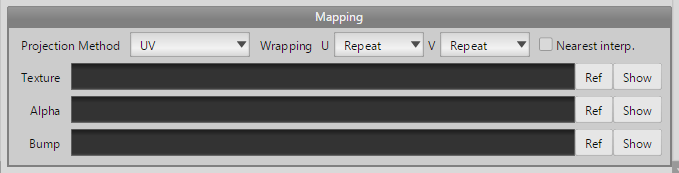
- Texture
- The color or pattern of the image file is pasted to the surface. Texture mapping is an easier expression rather than coloring directly materials.
- Alpha
- It specifies the transparency according to the lightness of the image. Black is transparent, white is opaque, and gray parts are translucent.
- Bump
- It specifies the unevenness on the surface by the image map. The surface looks uneven, but they are not actual polygons.
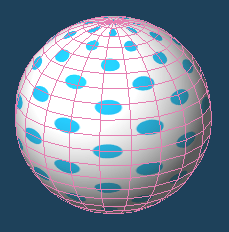
The mapping image that can be specified is either of two types.
Bump map specifies the unevenness with the lightness of 8 bit gray scale. Normal map specifies the normal direction in RGB values. (Other than 8 bit image is considered as normal map.)
Next, it is a tutorial of expression that uses the above mapping. Mapping images are edited using [Paint] command.
A tutorial to create hair objects with Paint command
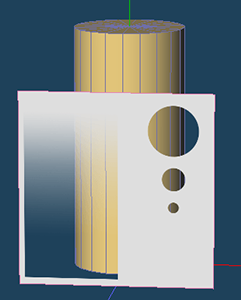
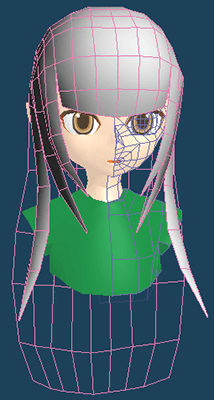
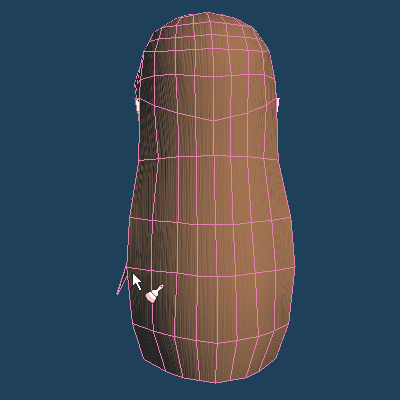
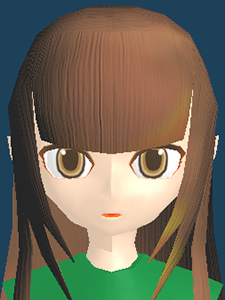
There are models of humanoid characters. Let's make this head object look like hair.
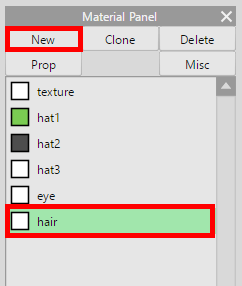
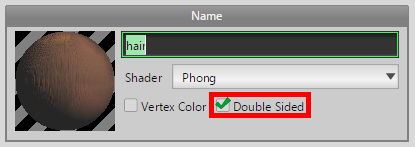
Create a new material "hair" on Material panel.
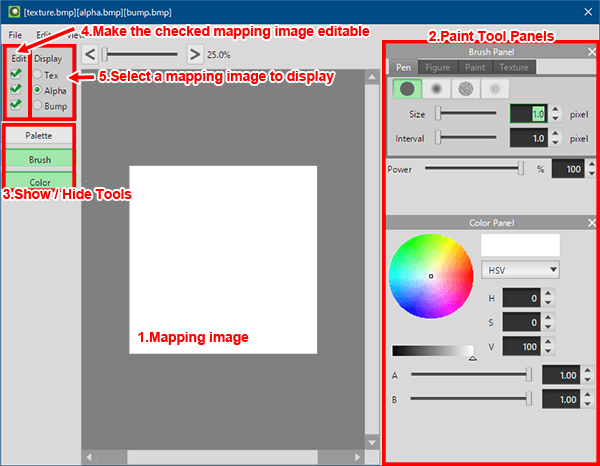
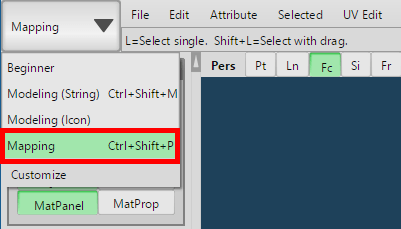
Switch the editing mode to [Mapping].
- Preparing mapping images
First, prepare a blank image file.
In Metasequoia 4, when a non-existent image file name is input in the [Mapping] specification field, a new blank image file is automatically created.
In this case, new BMP image files were created by inputting "texture.bmp" for [Texture], "alpha.bmp" for [Alpha], and "bump.bmp" for [Bump].
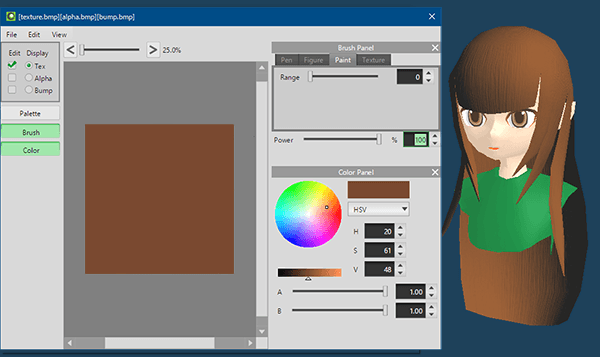
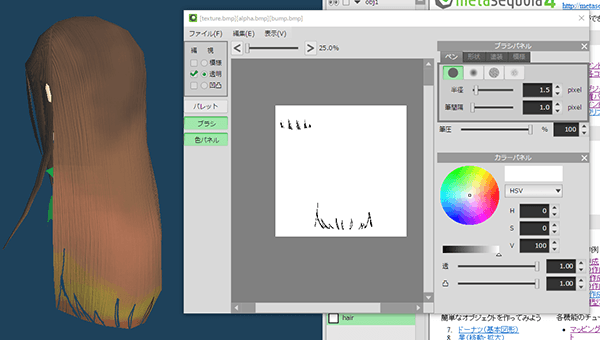
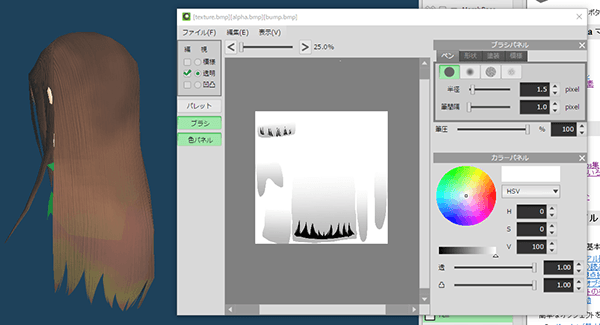
Select [Paint] from the command and open [Paint panel]. The created blank image file is displayed.
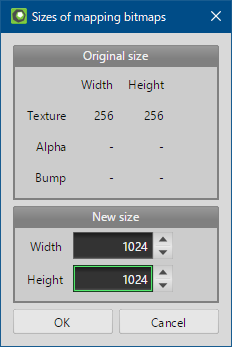
The resolution of the image file created by Metasequoia 4 is 256px * 256px. This is small. Use [Resize] in the Paint panel menu to resize each image to 1024px * 1024px.
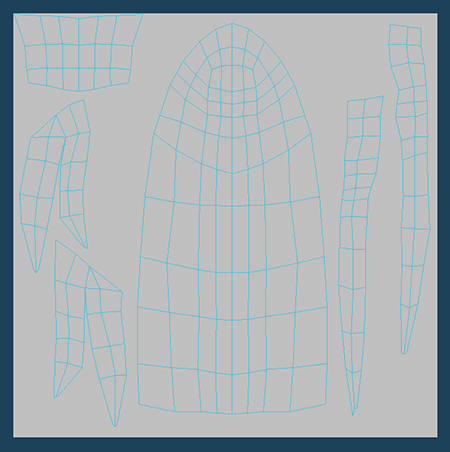
- UV Auto unwrap
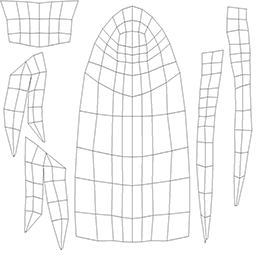
Close [Paint Panel] once and edit UVs. Use [Auto unwrap] to expand UVs of the "hair" object.
Select cracks along the hair and click [Execute]. Set the [Algorithm] to [Angle Base] and [Rotate] to [None].
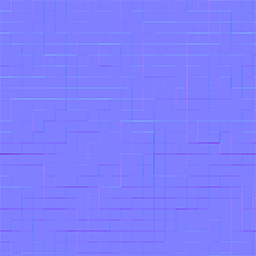
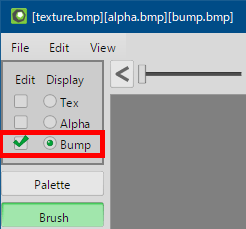
- Expression of hair with Bump map
Return to [Paint panel] and edit [Bump] mapping image.
At the top left of the panel, switch display image. Uncheck [Edit] except for [Bump] so that you can not edit.
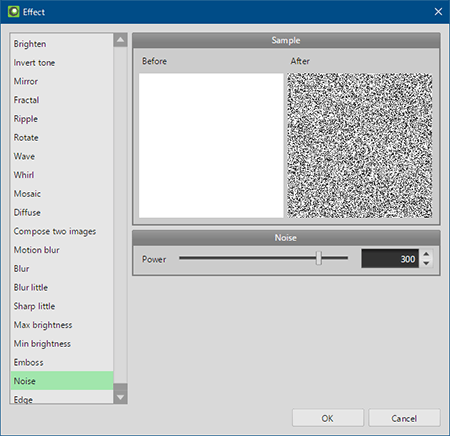
Select [Effect] from [File] in the Paint panel. First select [Noise]. Specify a suitable value, and click [OK].
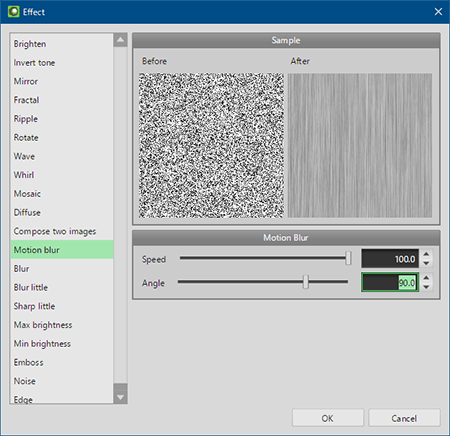
Open [Effect] again. Next, run [Motion blur] with [Speed] to 100 and [Angle] to 90 degrees.
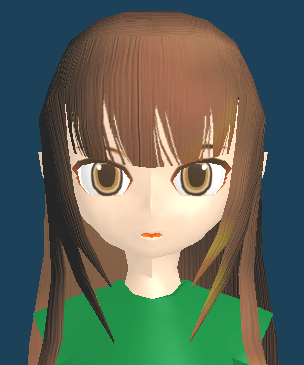
Vertical stripes have been drawn on Bump map. This expresses hair.
- Adjustment UVs along the hair flow
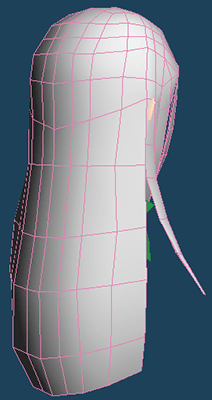
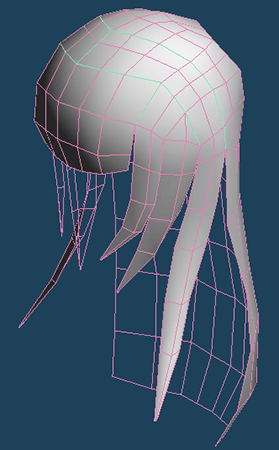
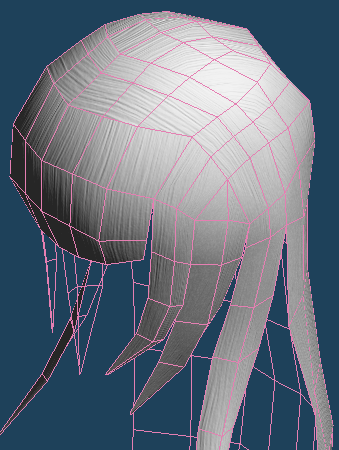
Check the hair object on 3D view.
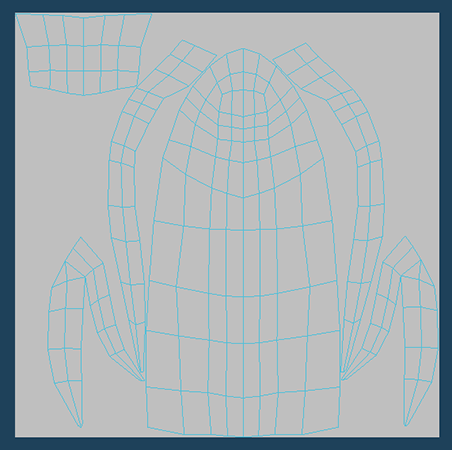
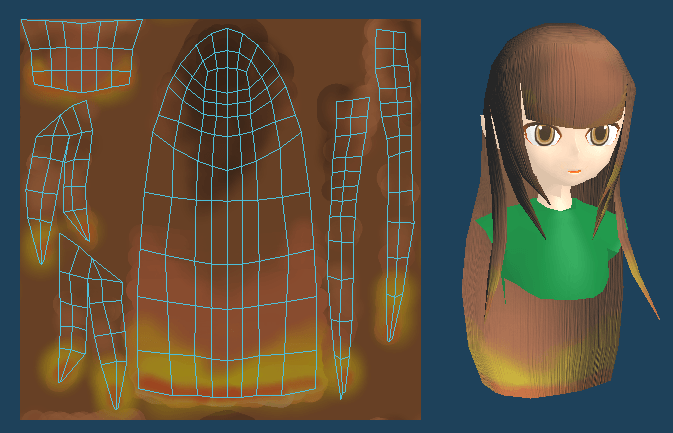
The flow by bump map may have an unnatural part to the head. This is because the direction of drawing of bump map (blue arrow in the figure below) and the direction of UV development (red arrow) do not match. Adjust such places using UV edit, [Move], [Rotate] etc.
I moved the position of the parts and adjusted the UV development.
- Coloring by [Texture] mapping
Return to [Paint] command and color the hair. For coloring, use [Texture] mapping.
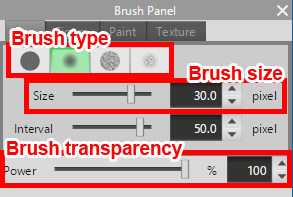
Select [Paint] tab in [Brush Panel]. [Paint] is a tool that corresponds to "Bucket" in paint software. Use this first to paint the image with a hair-like color.
Check [Double-sided] in [Material Property] so that the back side of the hair is also displayed.
Select [Pen] in [Brush Panel]. By dragging on an object in 3D view, you can edit the mapping image like coloring the object directly.
While adjusting [Size] and [Power] in the brush panel, paint like a gradation.
- Drawing hair ends by Alpha mapping
Finally, use Alpha mapping to make it look like hair.
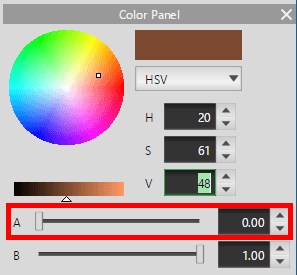
When editing [Alpha] map, adjust the transparency with the [A] slider in the [Color panel]. 0.00 is transparent and 1.00 is completely opaque.
Draw directly on the object by a brush in the same way as Texture mapping.
You can save the edited mapping images by [File> Save to File] in the Paint panel.
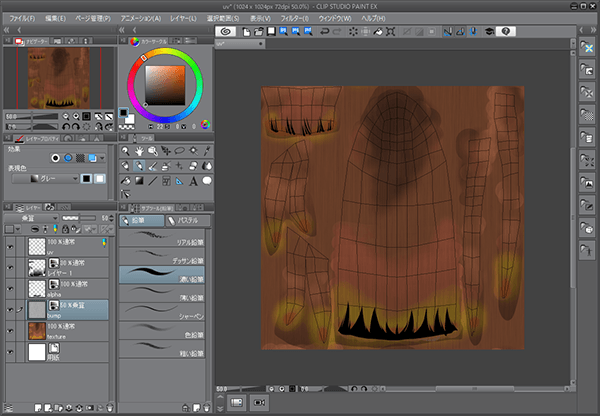
Edit with other graphic editing software
After creating a rough sketch of the mapping image in Metasequoia 4, finishing can be done with other graphics editing software.
There is no need to exit Metasequoia 4 when editing mapping images with external software. If the mapping image is changed and saved, Metasequoia 4 will detect the change when the window is activated.
- Create a rough sketch of the mapping image in Metasequoia 4
- Edit and save the file with another graphics editing software
- When returning to Metasequoia 4, changes in the mapping image are immediately reflected.
The following describes the preparation of image files for editing mapping images in other graphics editor.
- Folder where the mapping image created with Metasequoia 4 is saved
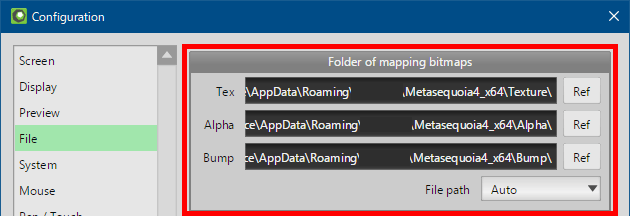
- First, locate the folder where the mapping image created with Metasequoia 4 is saved.
When created from a blank image file with Metasequoia 4, the save destination of the file is the folder specified in [Configration].
Opens the specified folder and finds the image file. Copy each file to the same folder as the working MQOZ file.
- Export of UV development
- Then, export the UV development. Select [UV Edit > Export] in the Metasequoia 4 menu.
Select [File] and specify a file name. You can save the UV development as an image file.
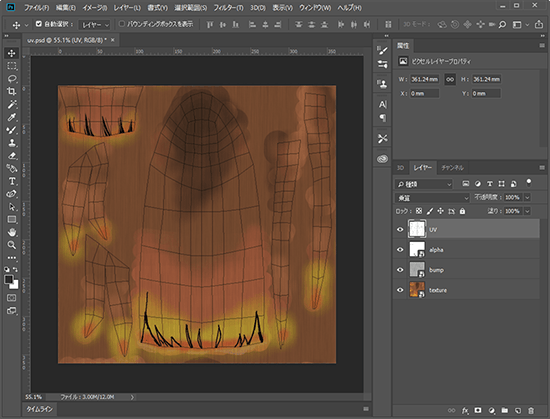
If you use graphics editor that has layers function such as Photoshop, you can display the UV development and mapping images on top of each other.
*It can be overlapped and displayed when blending Mode of each layer is set to "Multiply".
Save the image frequently and try editing while checking the display on 3D with Metasequoia 4.