3D modeling software "Metasequoia" official web site
3D modeling software "Metasequoia" official web site
We continue to develop Metasequoia 4 to make it easier for more users.
However, new users or users who have used the software after a long time may miss Metasequoia's features.
In this article, we will introduce some of the features we haven't introduced in detail in the past.
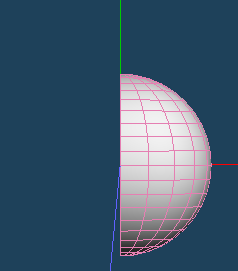
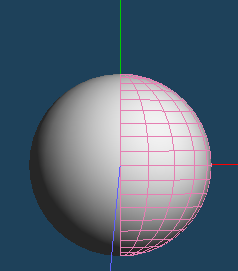
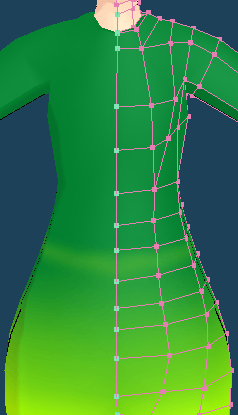
With [Mirroring] objects, you can easily create symmetrical objects.
 |
 |
 |
|
 |
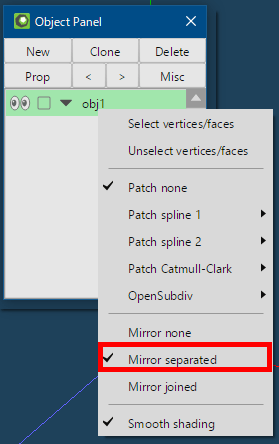
| Create the right half | Set from Object property | Mirroring object is displayed |
[Mirroring] halves the effort of modeling symmetric objects. This is a commonly used technique for modeling human body etc..
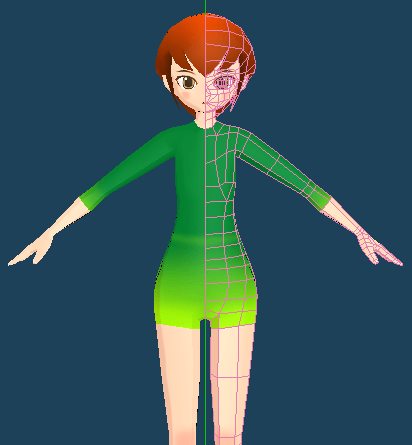
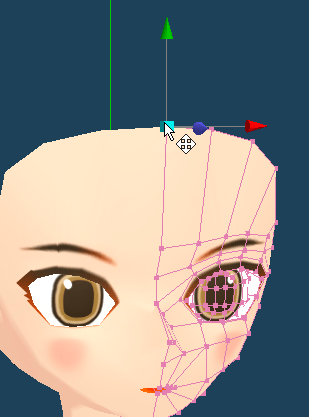
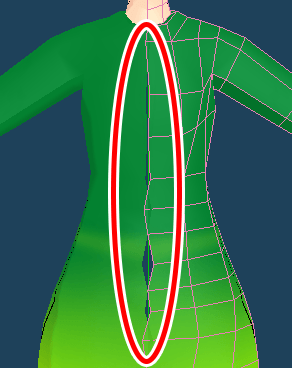
When mirroring editing, the coordinates of the vertex that should be at the center of the object may deviate from X = 0. Then, cracks will be made in the mirror object surface.
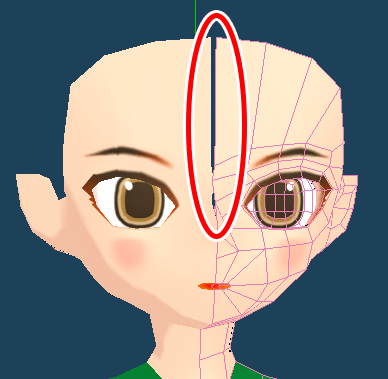
Let's fix cracks easily. And set [Edit Option] to prevent unintentional shifting of the vertices.
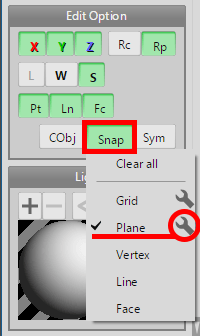
If there are a little vertices to fix, it is solved by [Snap] to attach the vertices to the YZ plane(X-axis). Check [Snap > Plane] in [Edit Option]. And, click on the tool mark to open the settings dialog.
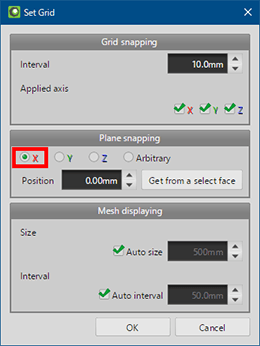
In [Plane Snapping] section, select [X] and press [OK]. While [Snap] is enabled, the edited vertex will be attached to the X = 0 plane (YZ plane).
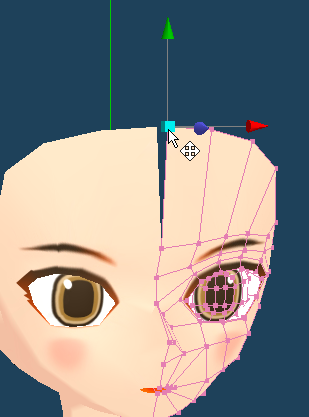
Select the vertices that need to fix. Move a little by [Move] command. The vertex is automatically moved to the position of coordinate X = 0, and the crack is fixed.
 |
|
 |
After fix is completed, disable [Snap].
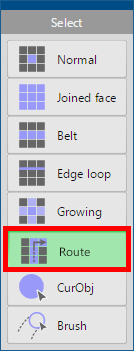
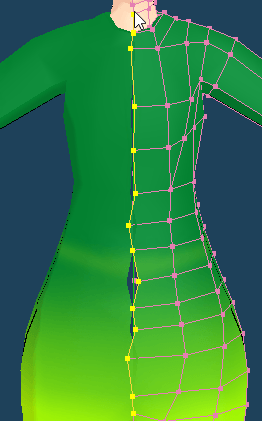
If there are many vertices to be corrected, change the coordinates at once using [Align vertices].
First, select the vertices on the centerline by [Route] selection of [Select] command. There is no problem if the selection contains vertices that do not require modification.
Select [Selected > Align Vertices] in menu.
Input coordinate 0 to [Position] of [X] and check [Apply]. Remove [Apply] of [Y] and [Z].

Click [OK] to align the coordinates of multiple vertices.
Next, I will show you how to prevent the deviation of the X coordinate of the vertices as much as possible.
One way is to use [Snap]. However, if you use [Snap], vertices other than the center will be attached to X = 0 also.
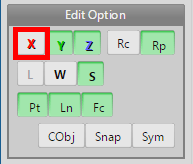
You can restrict movement in the X-axis direction in [Edit Options] without [Snap].
The [X / Y / Z] button at the top of the [Edit Option] sets whether to allow editing in each axis direction. Click [X] and disable editing to X-axis direction.
 |
|
 |
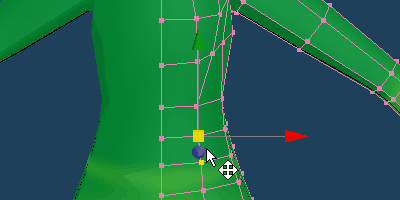
Try moving a vertex by [Move] command. A vertex can not be moved to the X-axis direction. But it can be moved in other directions.
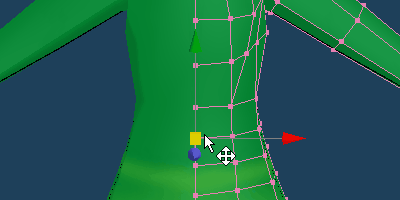
The same restrictions apply to vertices other than on the centerline. If you need to move to the X direction, use the red arrow handle for X-axis instead of the yellow square at the center of the handle. Arrow handles can be operated under restrictions.
Please use them according to the operation you want to do.